Creating Records
DNS records ensure your domain name is linked to the correct servers, for example, for your website, email, or other online services.
Setting these records correctly is important to make sure your domain is reachable and reliable.
A Record
In this section, we will look at what an A record is and how to create one in the control panel.
What is an A record?
An A record (Address Record) links a domain name or subdomain to a specific IPv4 address.
When someone types your domain name, this record ensures the visitor is directed to the correct server.
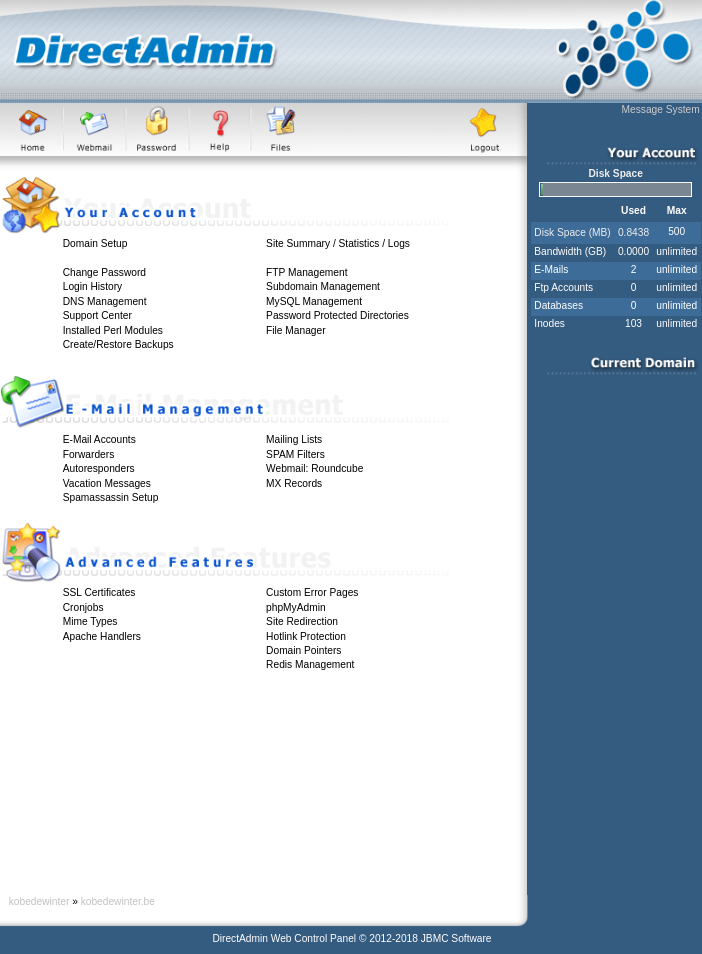
Step 1: Open the DNS Management screen
Log in to the control panel. You will land on the main screen. Click on DNS Management.

Step 2: DNS Management screen
After clicking on DNS Management, you will reach the following screen:

Scroll down on this page. At the bottom, you will see a table where you can create or edit DNS records.
Step 3: Create an A record
Now we will add an A record. Fill in the fields as follows:
-
1st box:
Enter the name for which you want to create a record. For example:@for the root domainwwwfor a subdomain- or something else, like
blog
-
2nd box:
Leave this as the default3600, unless you know you need something else. -
3rd box:
Enter the IPv4 address to which the domain name should point, for example192.168.1.1. -
Click "ADD" to add the record.
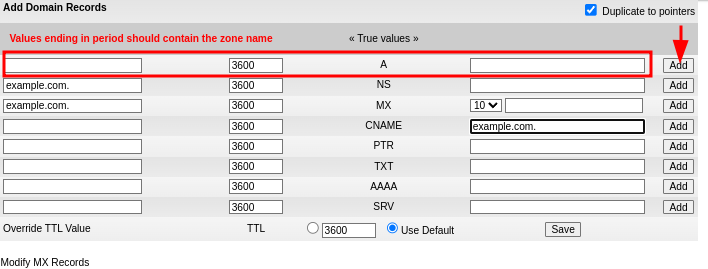
After filling in the details, click ADD to save the A record.
NS Record
In this section, we explain what an NS record is and how to create one in the control panel.
What is an NS record?
An NS record (Name Server Record) determines which name servers are responsible for managing the DNS settings of your domain.
It ensures that DNS queries for your domain reach the correct server.
Step 1: Open the DNS Management screen
Log in to the control panel. You will land on the main screen. Click on DNS Management.

Step 2: DNS Management screen
After clicking on DNS Management, you will reach the following screen:

Scroll down on the page. At the bottom, you will see a table where you can create or edit DNS records.
Step 3: Create an NS record
Now we will add an NS record. Fill in the fields as follows:
-
1st box:
Enter@for the root domain or a subdomain such assub. -
2nd box:
Leave this as the default3600. -
3rd box:
Enter the name of the nameserver, for examplens1.example.com. -
Click "ADD" to save the record.
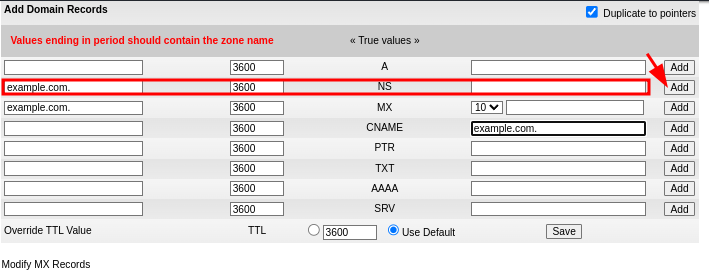
After filling in the details, click ADD to save the NS record.
MX Record
In this section about MX records, we will see how to create them and give a brief explanation of what MX records are.
What is an MX record?
An MX record (Mail Exchange record) is a DNS setting that indicates which mail server should receive emails for a domain name.
It ensures that incoming emails are sent to the correct server.
Step 1: Add an MX record
Log in to the control panel. You will land on the main screen. Click on DNS Management.
Step 2: DNS Management screen
After clicking on DNS Management, you will reach the following screen:
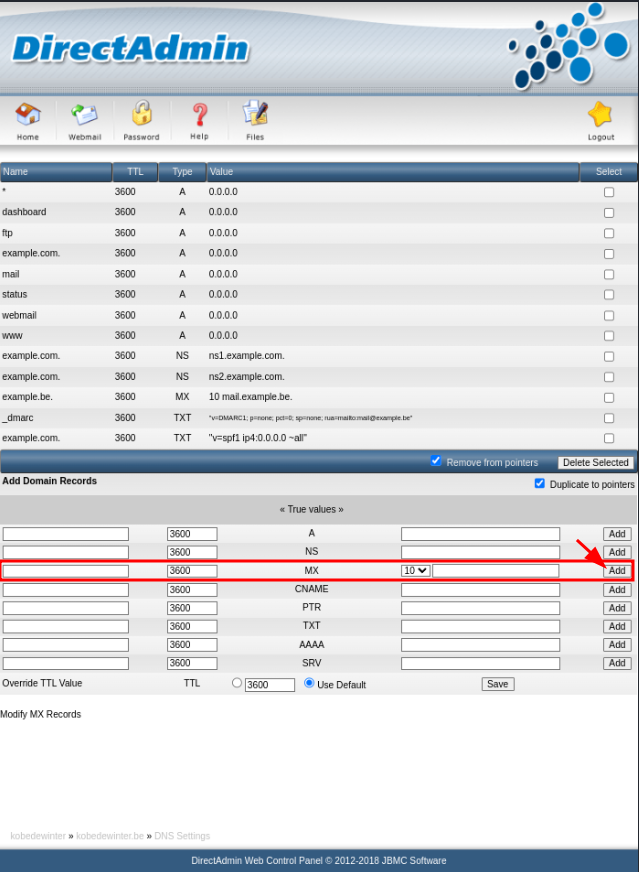
Scroll down on the page. At the bottom, you will see a table where you can create or edit DNS records.
Step 3: Create an MX record
Now we will add an MX record. Fill in the fields as follows:
-
1st box:
Enter@for the root domain. -
2nd box:
Leave this as the default3600. -
3rd box:
Enter a priority, for example10. -
4th box:
Enter the mail server address, for examplemail.example.com. -
Click "ADD" to save the record.

After filling in the details, click ADD to save the MX record.
CNAME Record
In this section about CNAME records, we will see how to create them and give a brief explanation of what CNAME records are.
What is a CNAME record?
A CNAME record (Canonical Name) is used to redirect a subdomain to another domain name (instead of an IP address as with an A record).
This record makes it easier to point multiple subdomains to the same destination.
Step 1: Add a CNAME record
Log in to the control panel. You will land on the main screen. Click on DNS Management.

Step 2: DNS Management screen
After clicking on DNS Management, you will reach the following screen:
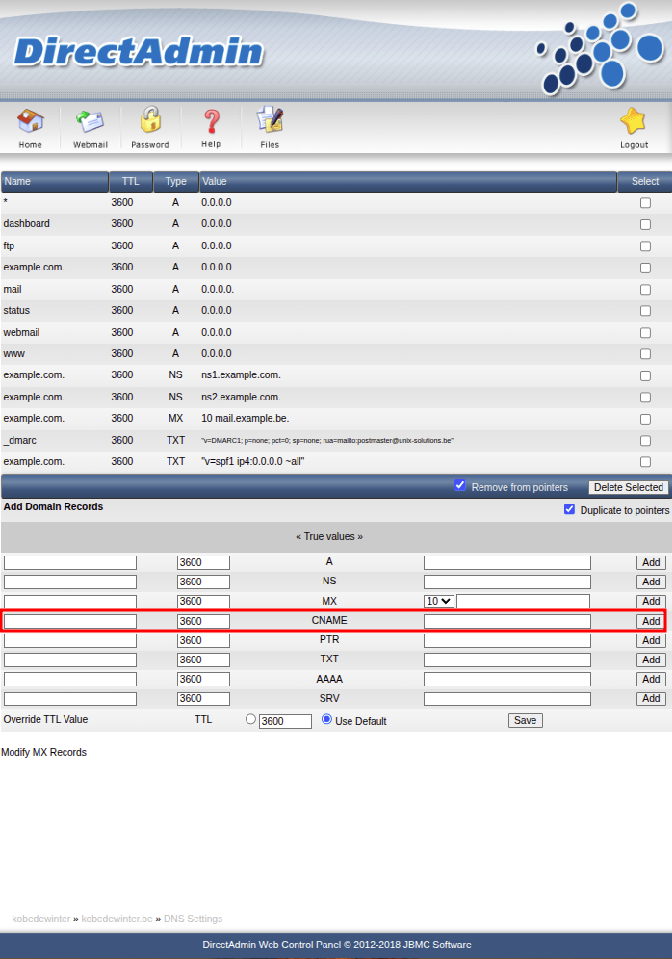
Scroll down on the page. At the bottom, you will see a table where you can create or edit DNS records.
Step 3: Create a CNAME record
Now we will add a CNAME record. Fill in the fields as follows:
-
1st box:
Enter the subdomain you want to redirect, for exampleblog. -
2nd box:
Leave this as the default3600. -
3rd box:
Enter the target host, for exampleexample.com. -
Click "ADD" to save the record.
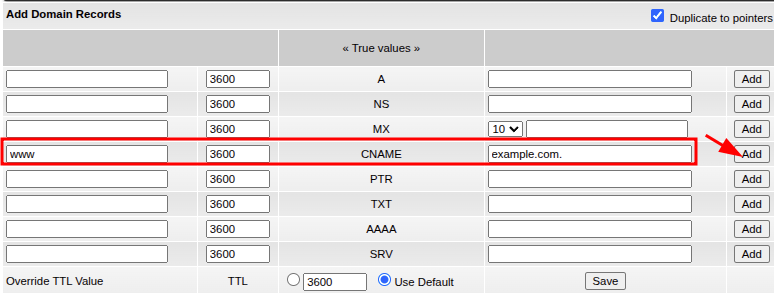
After filling in the details, click ADD to save the CNAME record.
TXT Record
In this section about TXT records, we will see how to create them and give a brief explanation of what TXT records are.
What is a TXT record?
A TXT record is a DNS record that stores textual information, often used for domain verification and email security such as SPF, DKIM, and DMARC.
It is also used for other purposes where textual information needs to be stored in DNS records.
Step 1: Add a TXT record
Log in to the control panel. You will land on the main screen. Then click on DNS Management.

Step 2: DNS Management screen
After clicking on DNS Management, you will reach the following screen:
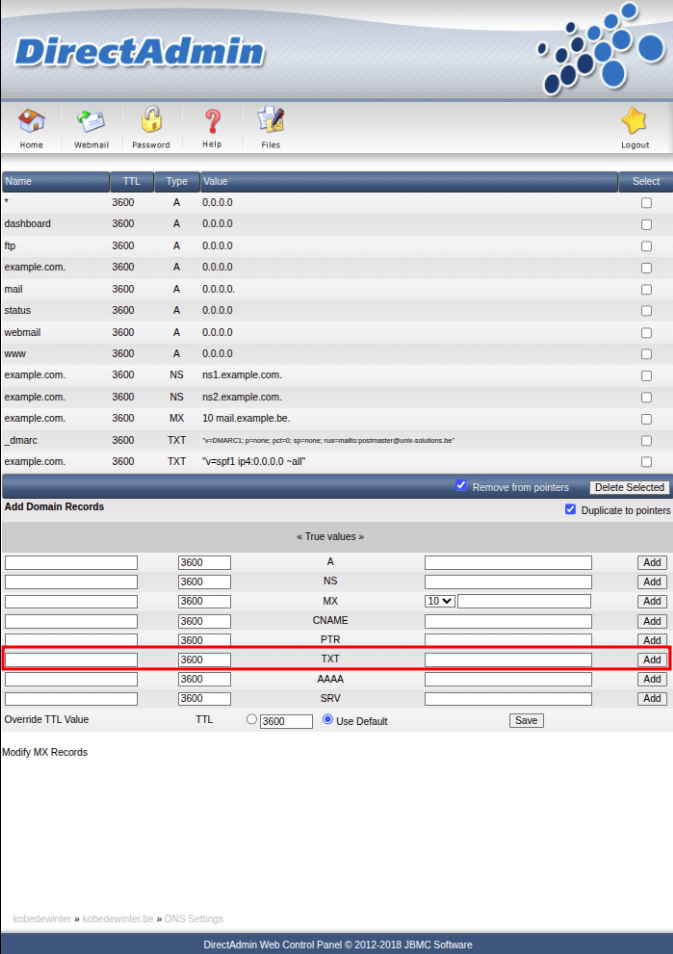
Scroll down on the page. At the bottom, you will see a table where you can create or edit DNS records.
Step 3: Create a TXT record
Now we will add a TXT record. Fill in the fields as follows:
-
1st box:
Enter@for the root domain. -
2nd box:
Leave this as the default3600. -
3rd box:
Enter the text you want to store, for example an SPF record for email security. -
Click "ADD" to save the record.
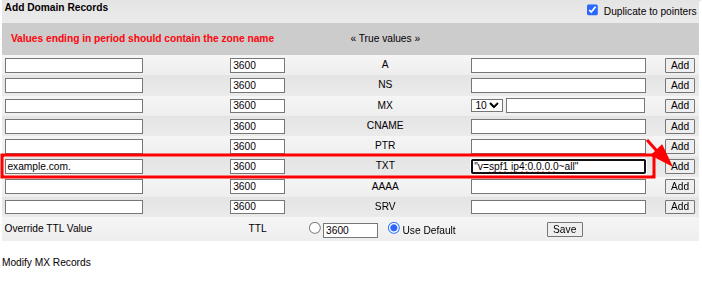
After filling in the details, click ADD to save the TXT record.
AAAA Record
In this section about AAAA records, we will see how to create them and give a brief explanation of what AAAA records are.
What is an AAAA record?
An AAAA record is a DNS record that links a domain name to an IPv6 address, just like an A record does for IPv4.
Step 1: Add an AAAA record
Log in to the control panel. You will land on the main screen. Then click on DNS Management.
Step 2: DNS Management screen
After clicking on DNS Management, you will reach the following screen:
Scroll down on the page. At the bottom, you will see a table where you can create or edit DNS records.
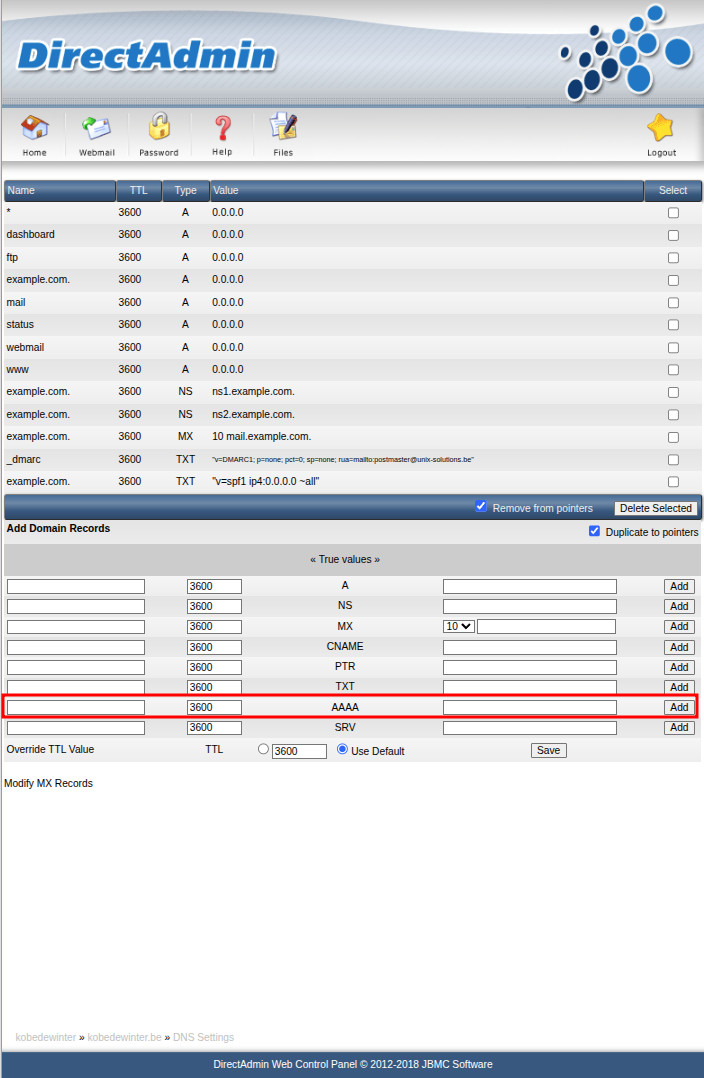
Step 3: Create an AAAA record
Now we will add an AAAA record. Fill in the fields as follows:
-
1st box:
Enter@for the root domain. -
2nd box:
Leave this as the default3600. -
3rd box:
Enter the IPv6 address, for example2001:0db8:85a3:0000:0000:8a2e:0370:7334. -
Click "ADD" to save the record.

After filling in the details, click ADD to save the AAAA record.