Creating Records
DNS records translate your domain name to the correct servers for websites, email, or other services.
Correctly setting these records is important to ensure your domain functions reliably and is easily reachable.
A Record
In this section about A records, we will look at how to create them and provide a brief explanation of what A records are.
What is an A record
An A record (Address Record) links a domain name or subdomain to a specific IPv4 address.
This ensures visitors are directed to the correct server when they enter your domain name.
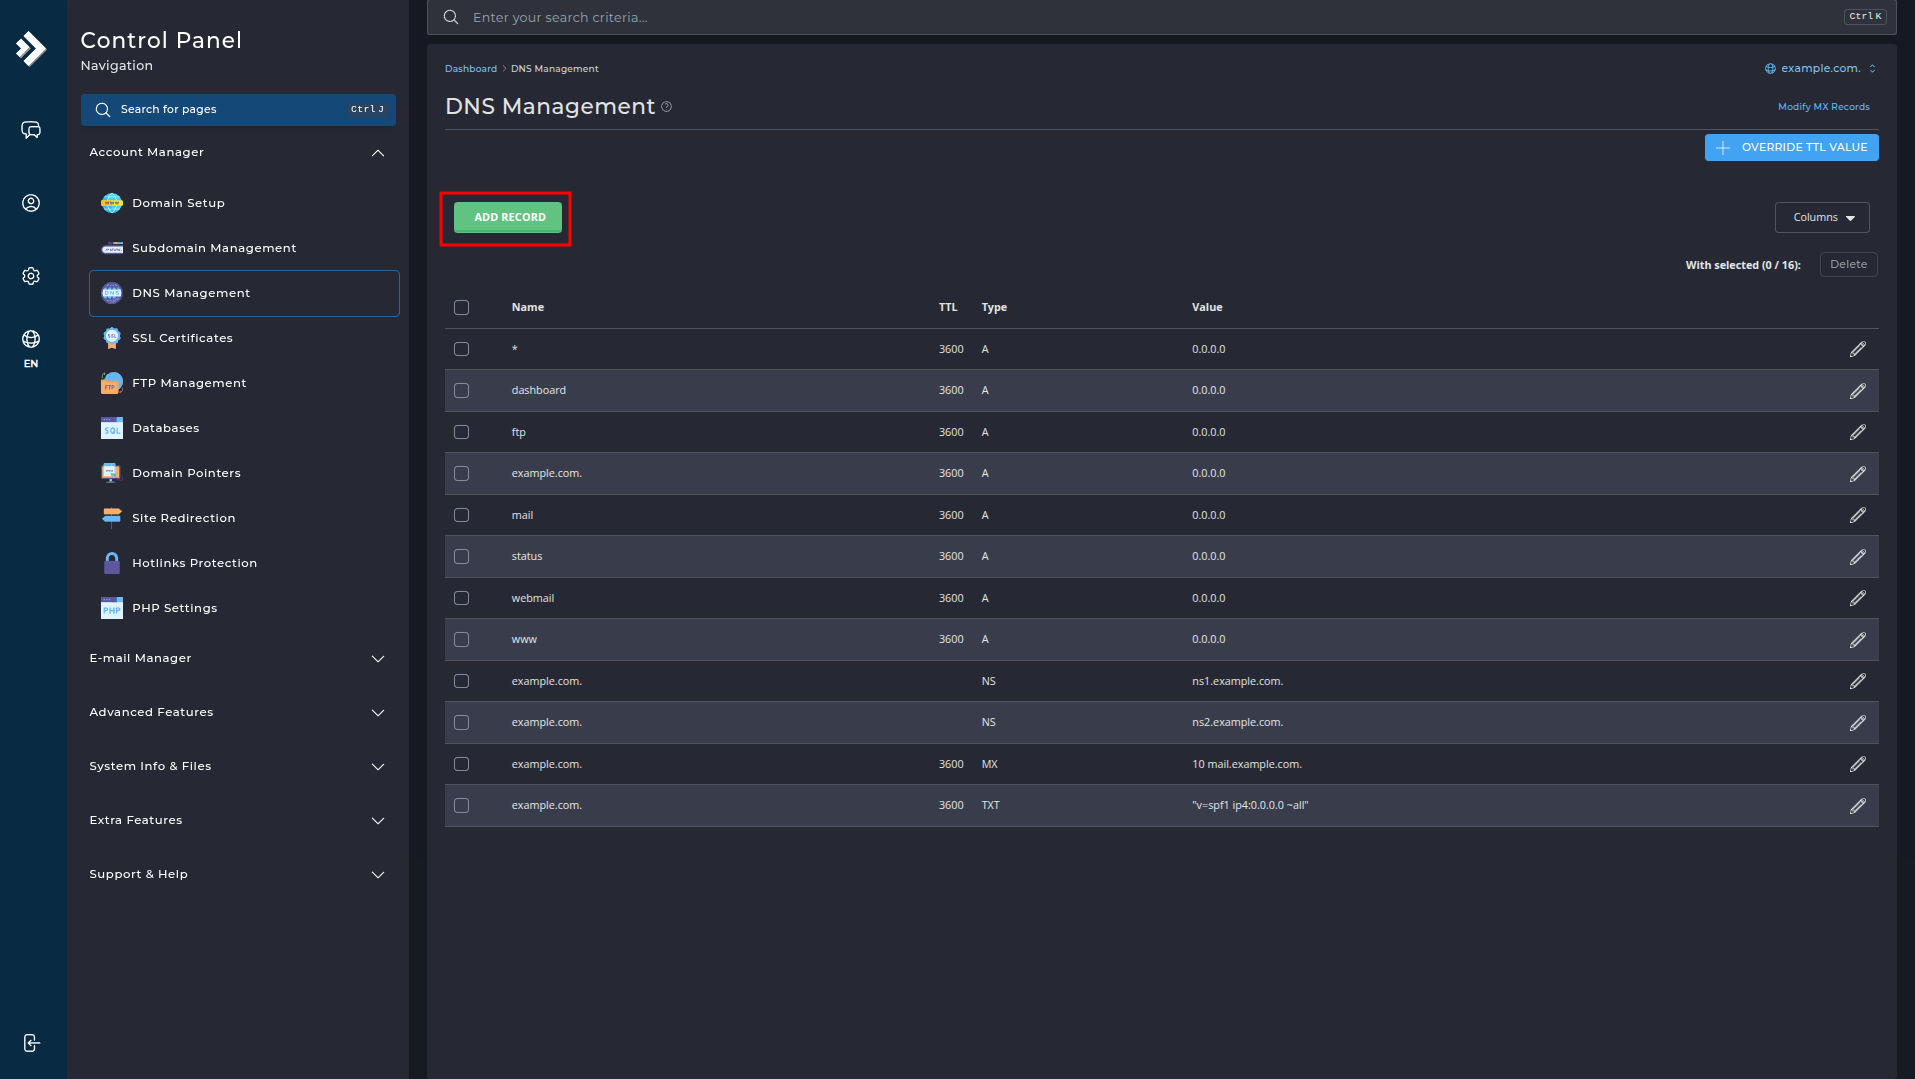
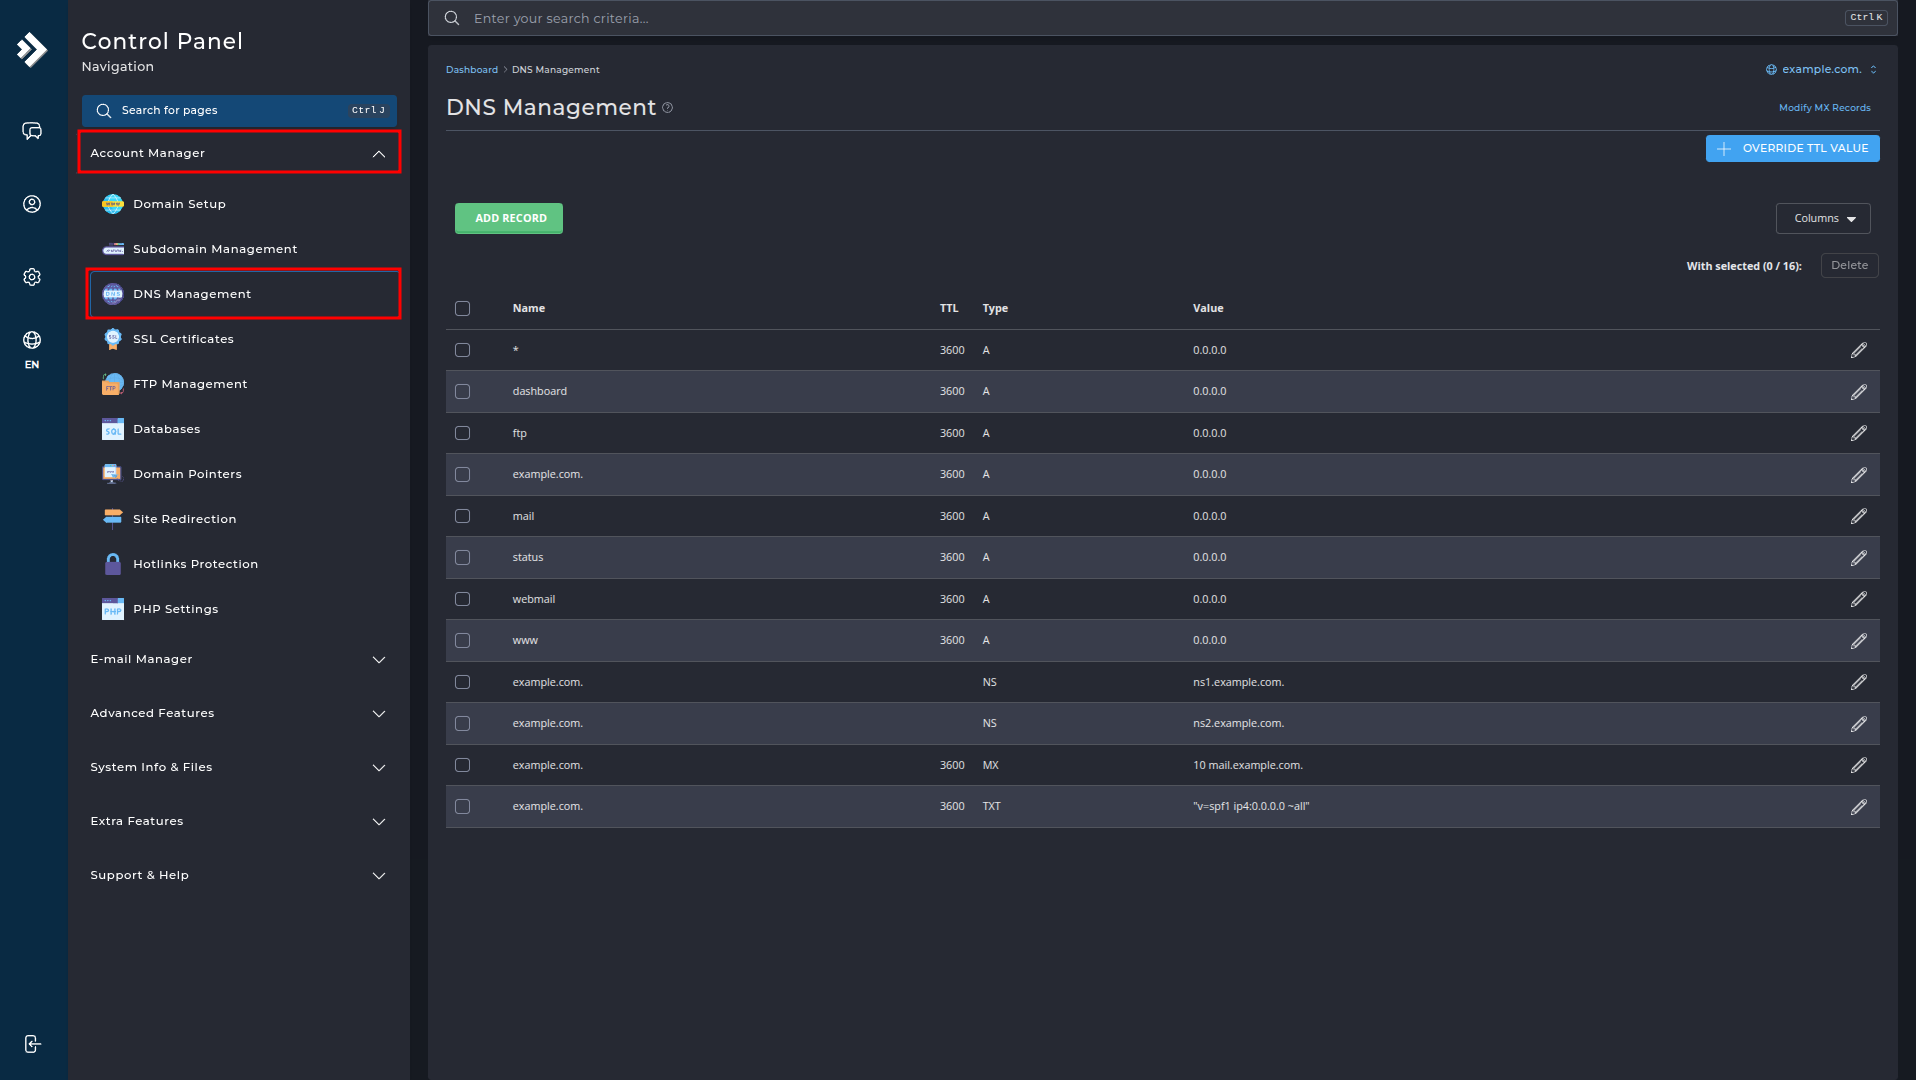
Step 1: DNS Management screen
Log in to your control panel. Once in the control panel, click on Account Manager and then DNS Management.
You should then see the following screen.

Step 2: Creating an A record
Let's start creating a record. Click on Add Record.
Step 3: Fill in the A record
Follow the steps below to add an A record:
-
Record Type:
SelectAfrom the dropdown menu. -
Name:
Enter the subdomain (for examplewww,@for root, orblog). -
TTL (Time To Live):
Leave this at the default3600unless you want to use a different TTL. -
Value:
Enter the IP address the domain should point to (e.g.,192.0.2.1). -
Click the green "ADD" button to save the record.

Once you click ADD, the record will be added to the list.
NS Record
In this section about NS records, we will look at how to create them and provide a brief explanation of what NS records are.
What is an NS record
An NS record indicates which name servers are responsible for managing the DNS settings of a domain.
It ensures that traffic to your domain reaches the correct server for DNS information.
Step 1: DNS Management screen
Log in to your control panel. Once in the control panel, click on Account Manager and then DNS Management.
You should then see the following screen.

Step 2: Creating an NS record
Let's start creating a record. Click on Add Record.

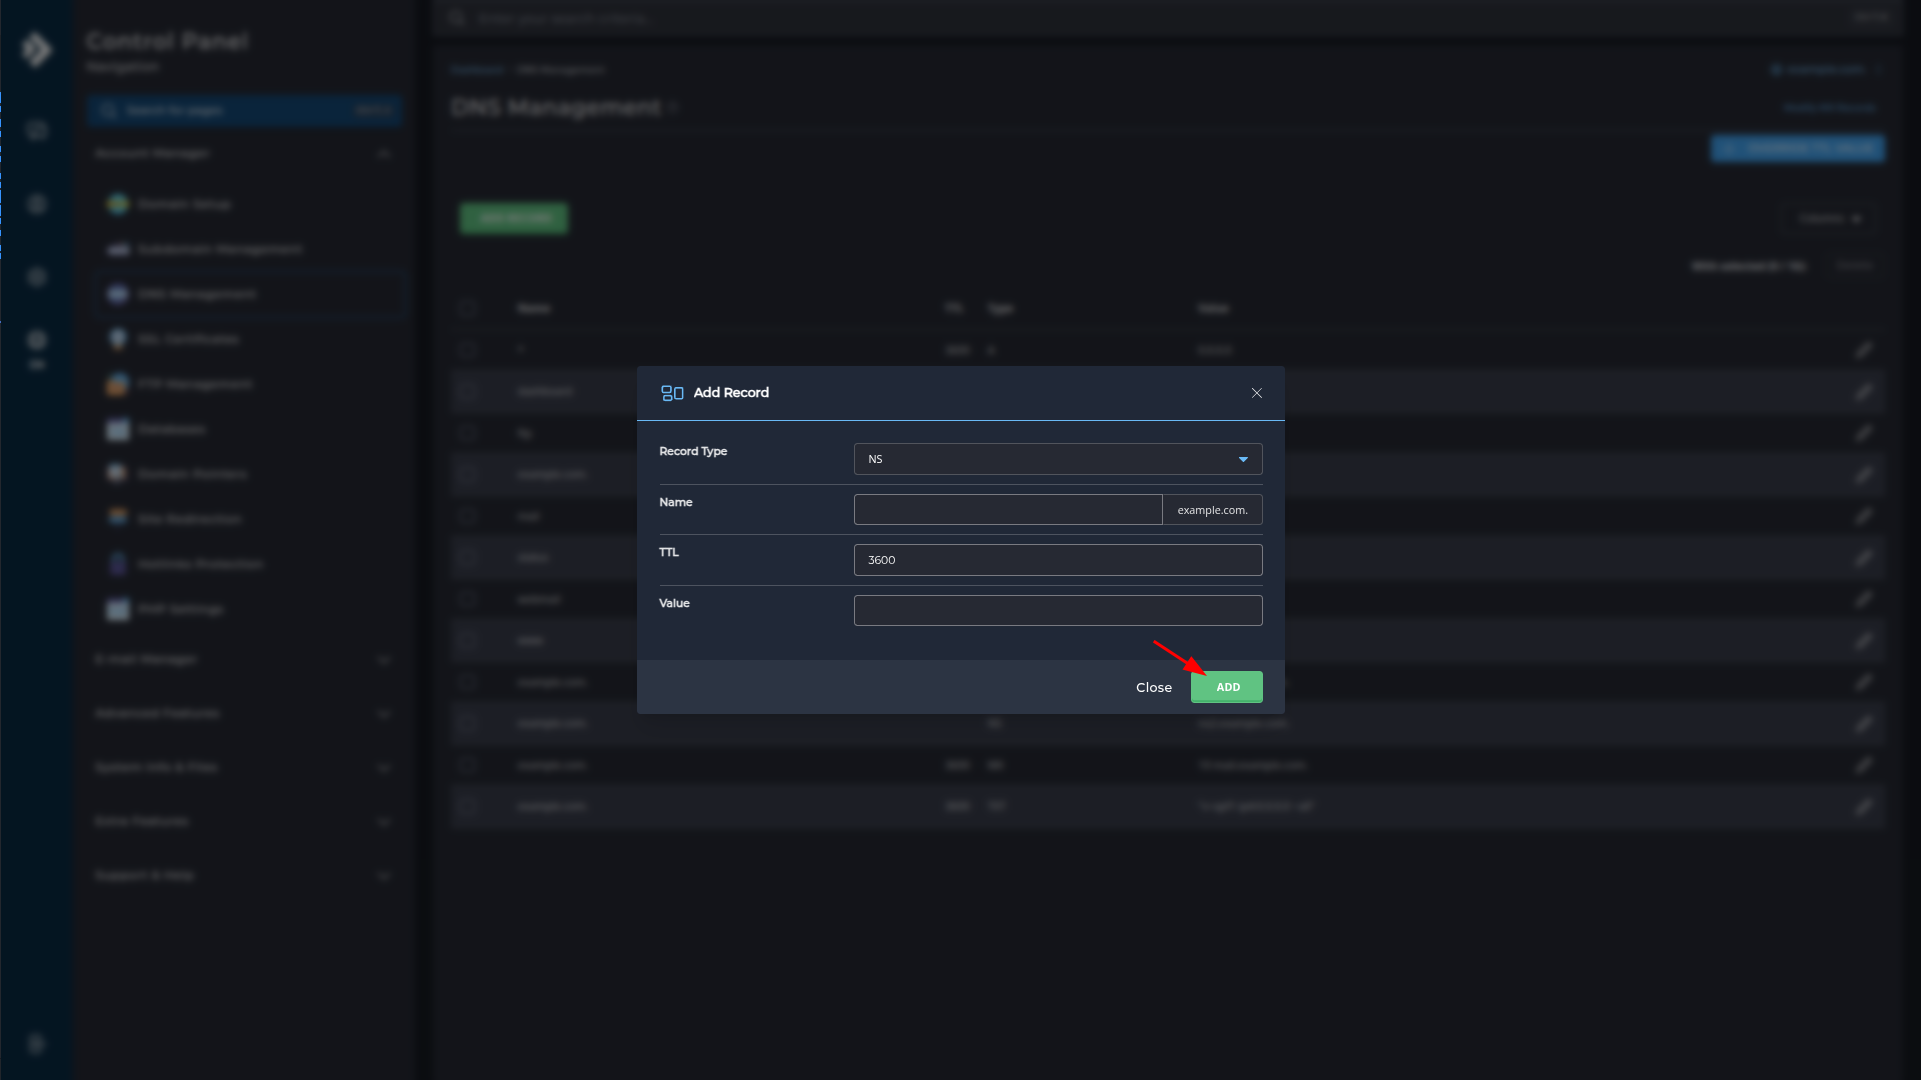
Step 3: Create the NS record
Follow the steps below to add an NS record:
-
Record Type:
SelectNSfrom the dropdown menu. -
Name:
Enter@for the main domain or a subdomain for which you want to set a separate nameserver. -
TTL (Time To Live):
Leave this at the default3600. -
Value:
Enter the full name of the nameserver (e.g.,ns1.example.com.). -
Click the green "ADD" button to save the record.
Once you click ADD, the record will be added to the list.
MX Record
In this section about MX records, we will look at how to create them and provide a brief explanation of what MX records are.
What is an MX record
An MX record (Mail Exchange record) is a DNS setting that indicates which mail server should receive emails for a domain.
Step 1: DNS Management screen
Log in to your control panel. Once in the control panel, click on Account Manager and then DNS Management.
You should then see the following screen.
Step 2: DNS Management screen
Let's start creating a record. Click on Add Record.

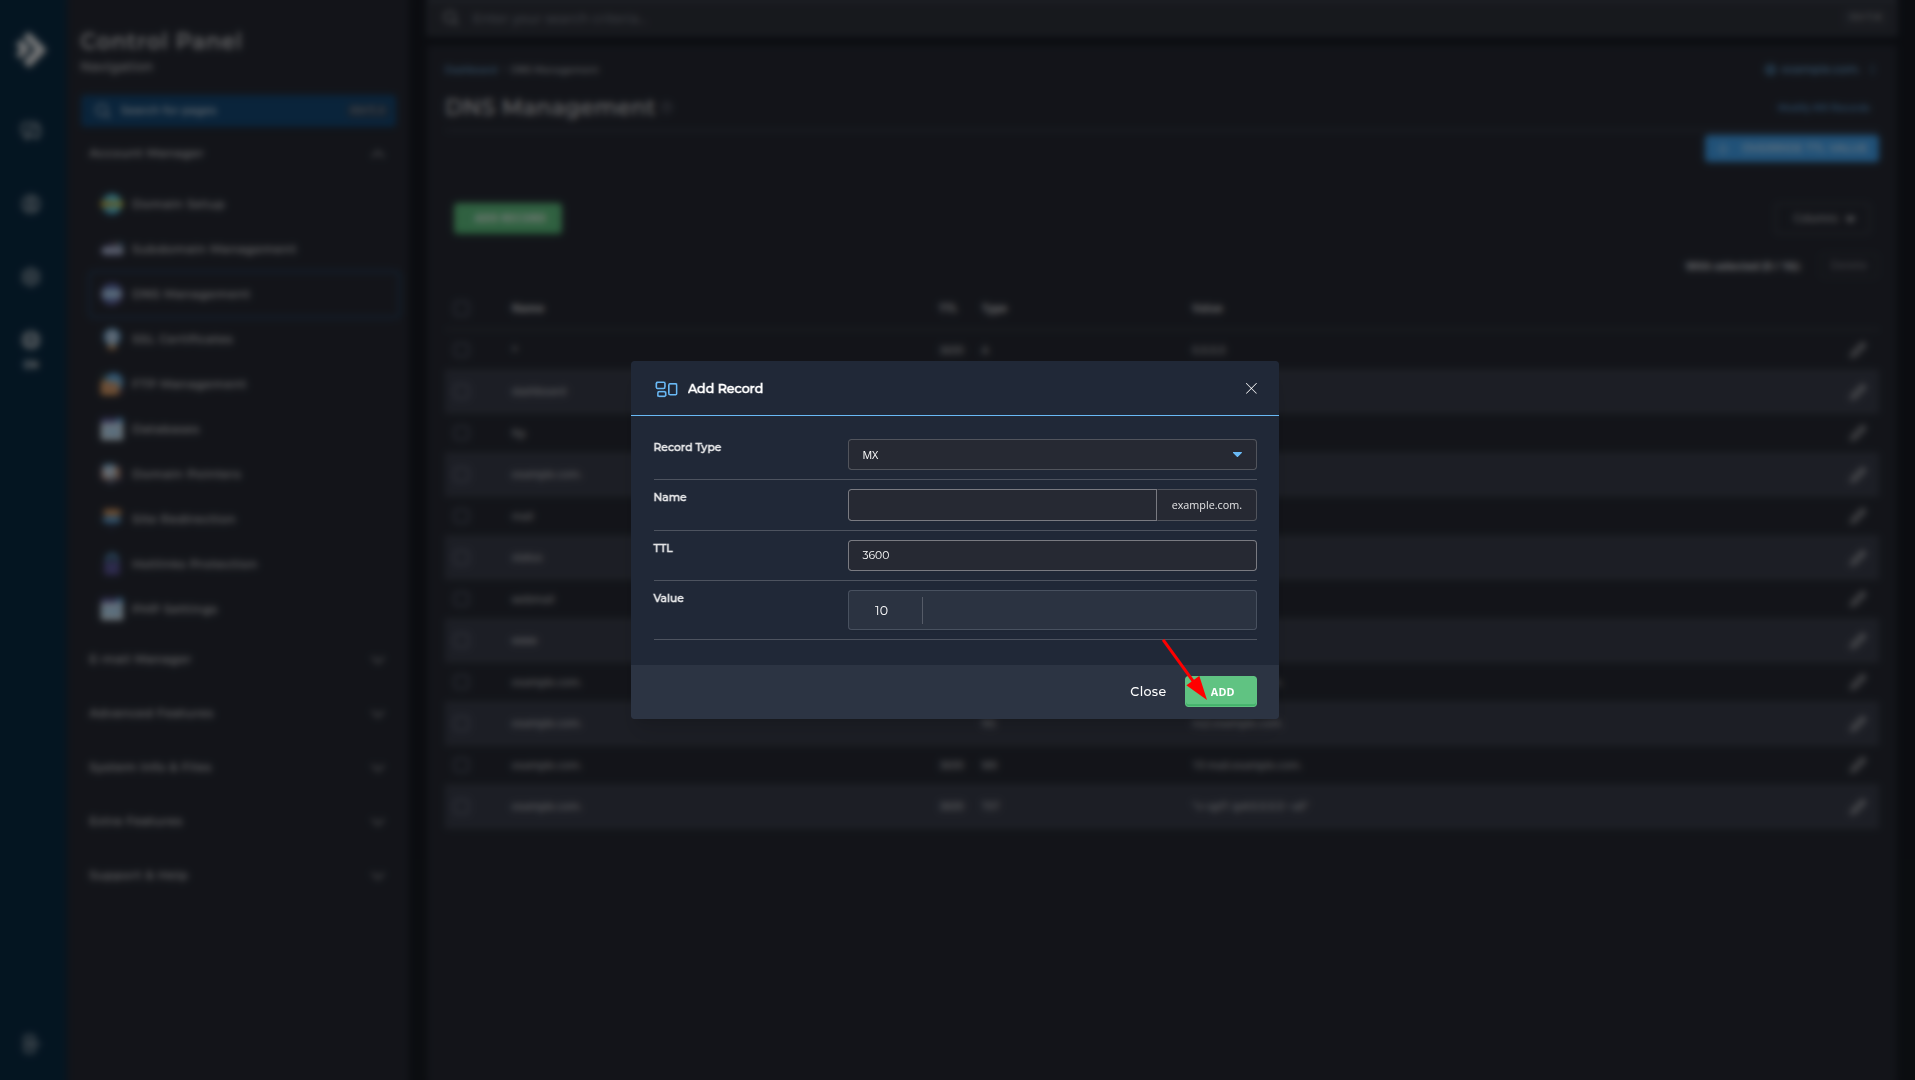
Step 3: Create the MX record
Follow the steps below to add an MX record:
-
Record Type:
SelectMXfrom the dropdown menu. -
Name:
Enter@for the main domain. -
TTL (Time To Live):
Leave this at the default3600. -
Value:
Enter the priority and mail server separated by a space (e.g.,10 mail.example.com.). -
Click the green "ADD" button to save the record.
Once you click ADD, the record will be added to the list.
CNAME Record
In this section about CNAME records, we will look at how to create them and provide a brief explanation of what CNAME records are.
What is a CNAME record
A CNAME record (Canonical Name) is used to point a subdomain to another domain name (instead of an IP address like with an A record).
Step 1: DNS Management screen
Log in to your control panel. Once in the control panel, click on Account Manager and then DNS Management.
You should then see the following screen.

Step 2: DNS Management screen
Let's start creating a record. Click on Add Record.

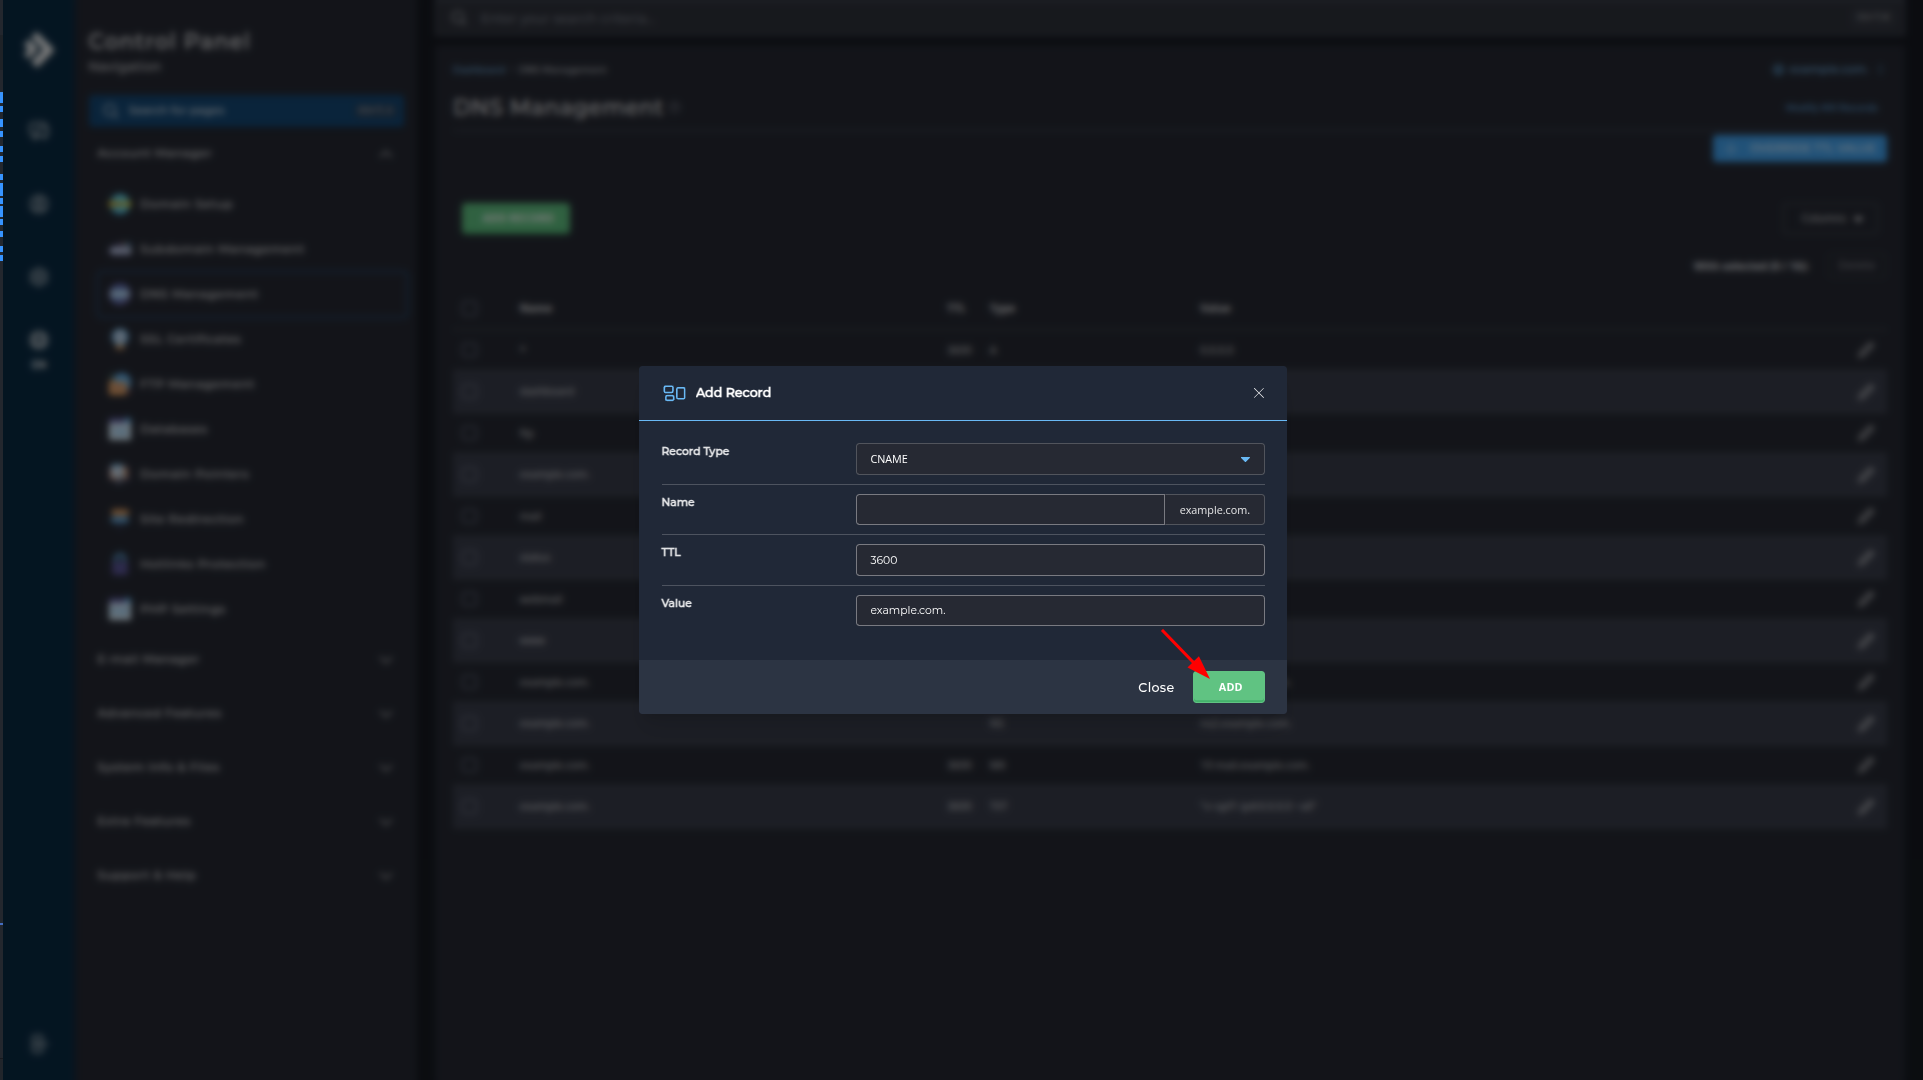
Step 3: Create the CNAME record
Now we will create our CNAME record. What to fill in:
-
Record Type:
SelectCNAMEfrom the dropdown menu. -
Name:
Enter the subdomain you want to redirect (e.g.,www). -
TTL (Time To Live):
Leave this at the default3600. -
Value:
Enter the target URL where the domain should point (e.g.,example.com.). -
Click the green "ADD" button to save the record.
Once you click ADD, the record will be added to the list.
TXT Record
In this section about TXT records, we will look at how to create them and provide a brief explanation of what TXT records are.
What is a TXT record
A TXT record is a DNS record that stores textual information, often used for domain verification and email security such as SPF, DKIM, and DMARC.
Step 1: DNS Management screen
Log in to your control panel. Once in the control panel, click on Account Manager and then DNS Management.
You should then see the following screen.
Step 2: DNS Management screen
Let's start creating a record. Click on Add Record.

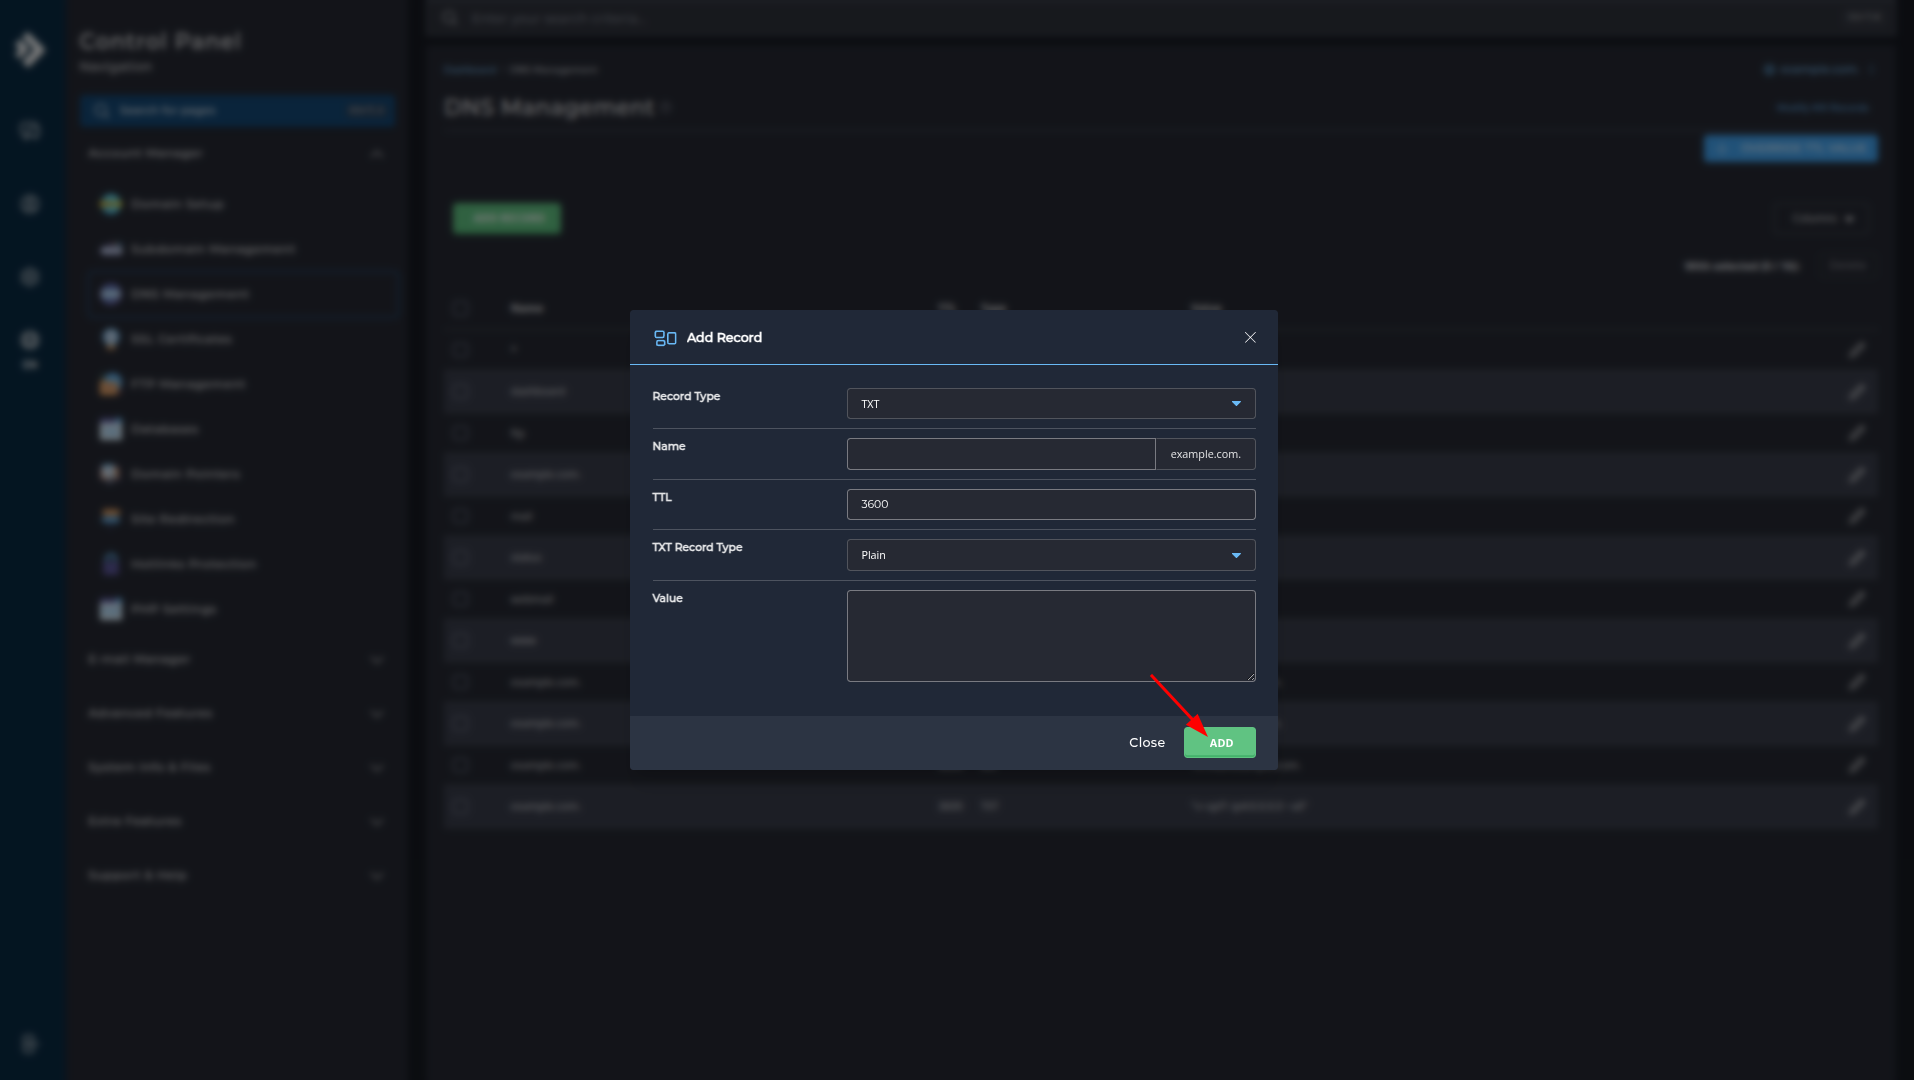
Step 3: Create the TXT record
Follow the steps below to add a TXT record:
-
Record Type:
SelectTXTfrom the dropdown menu. -
Name:
Enter@or the desired subdomain (e.g.,@for root or_dmarc). -
TTL (Time To Live):
Leave this at the default3600. -
Value:
Enter the textual content (e.g., an SPF record like"v=spf1 include:_spf.example.com ~all"). -
Click the green "ADD" button to save the record.
Once you click ADD, the record will be added to the list.