MacOS Mail
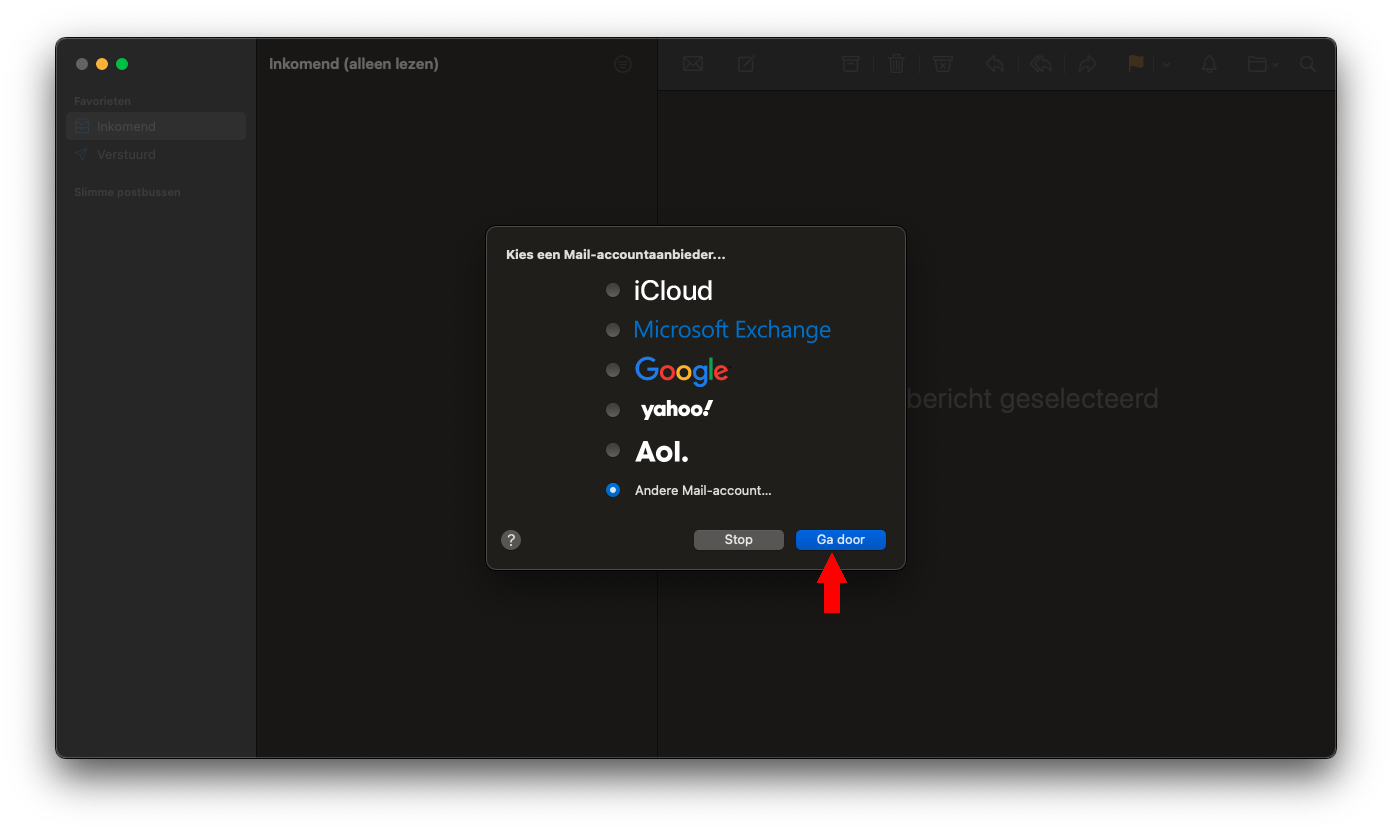
Step 1: Open the Apple Mail Application
Open the Apple Mail application. Then select Other Mail Account and click Continue.
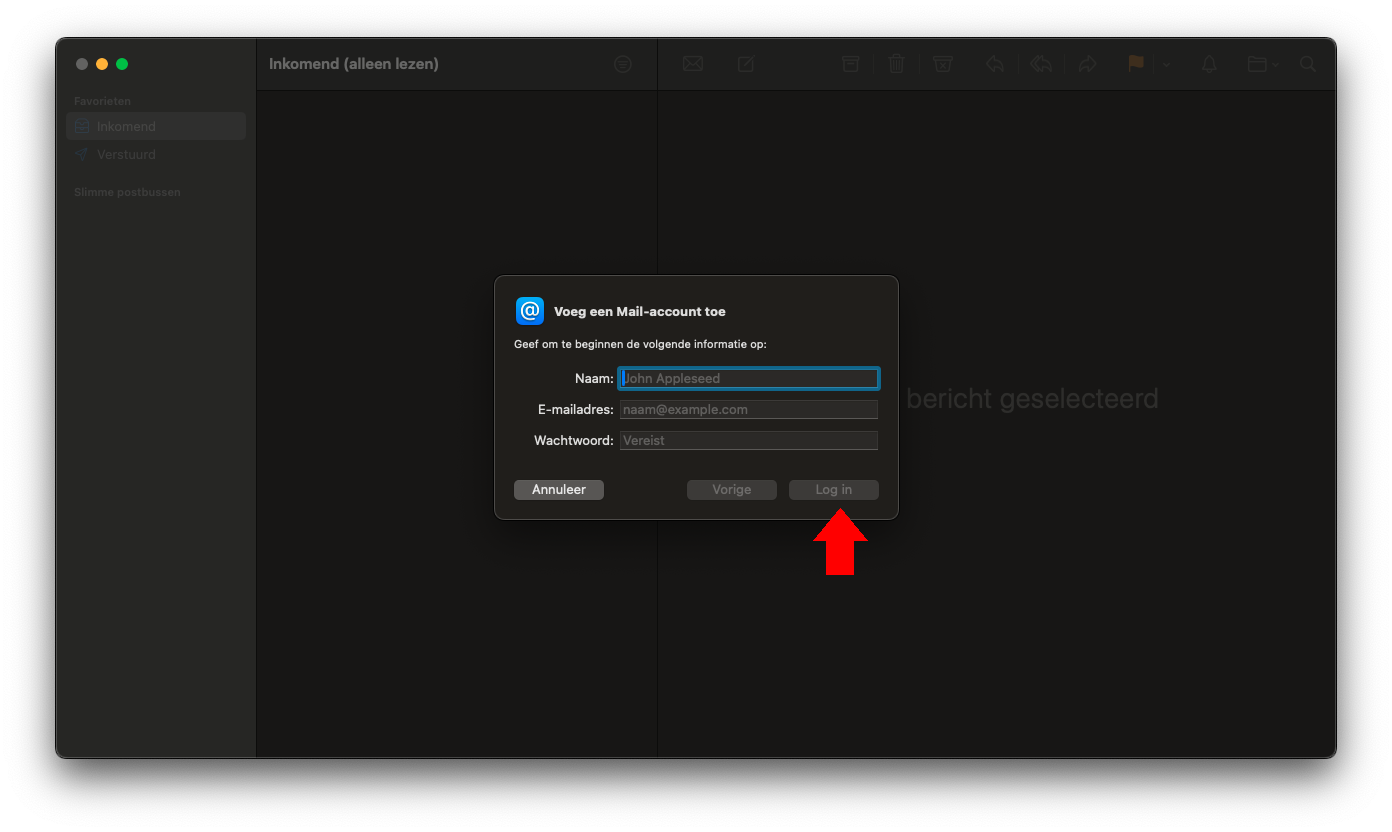
Step 2: Enter Your Login Details
Enter your email address here to ensure the correct settings are applied
On the next screen, fill in the following details:
| Item | Required Information |
|---|---|
| Name | Your first and last name |
| Email Address | email@example.com |
| Password | Your password |
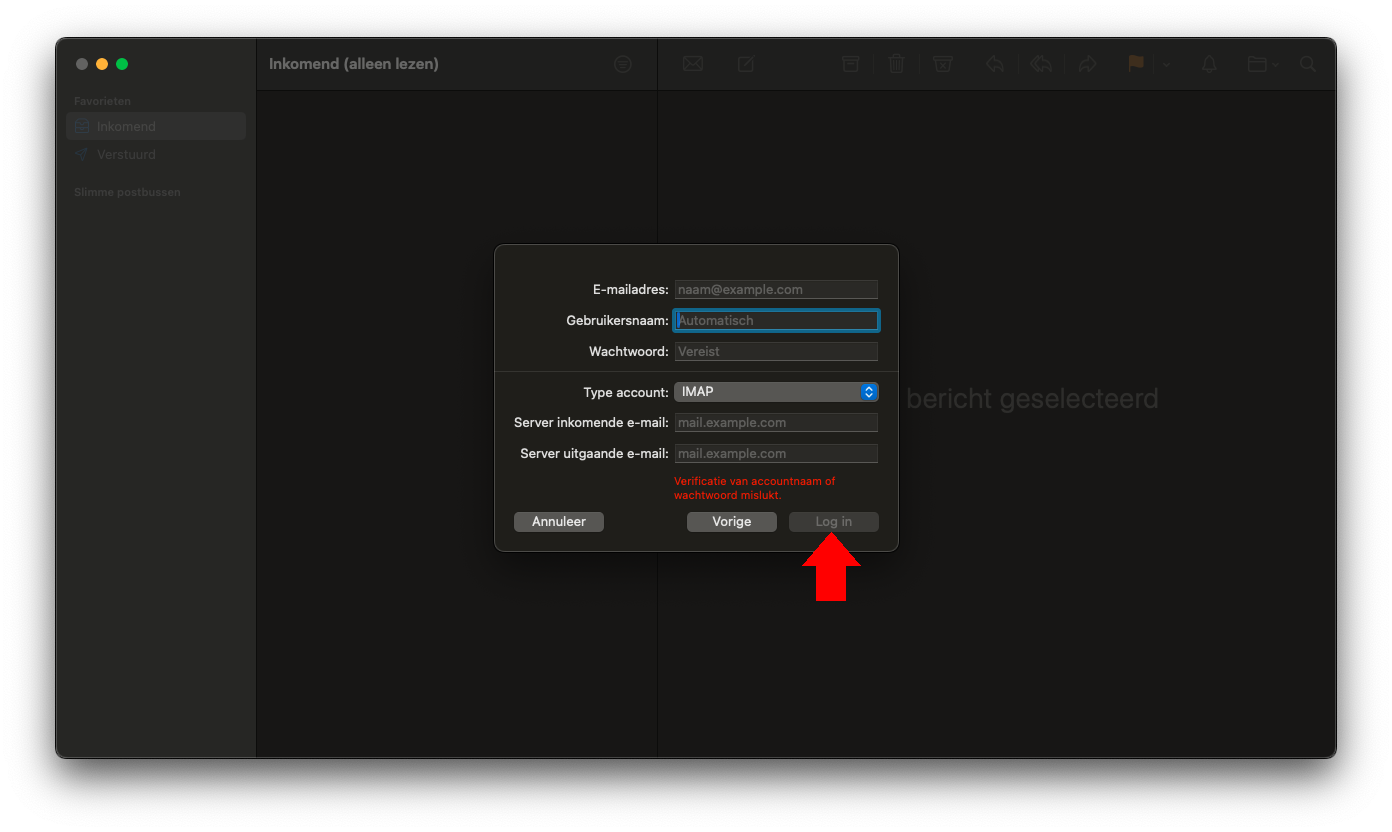
Step 3: Server Details
Now, enter the server details:
| Item | Required Information |
|---|---|
| Email Address | email@example.com |
| Username | This can be left blank |
| Password | Your password |
| Account Type | IMAP |
| Incoming Mail Server | mail.example.com |
| Outgoing Mail Server | mail.example.com |
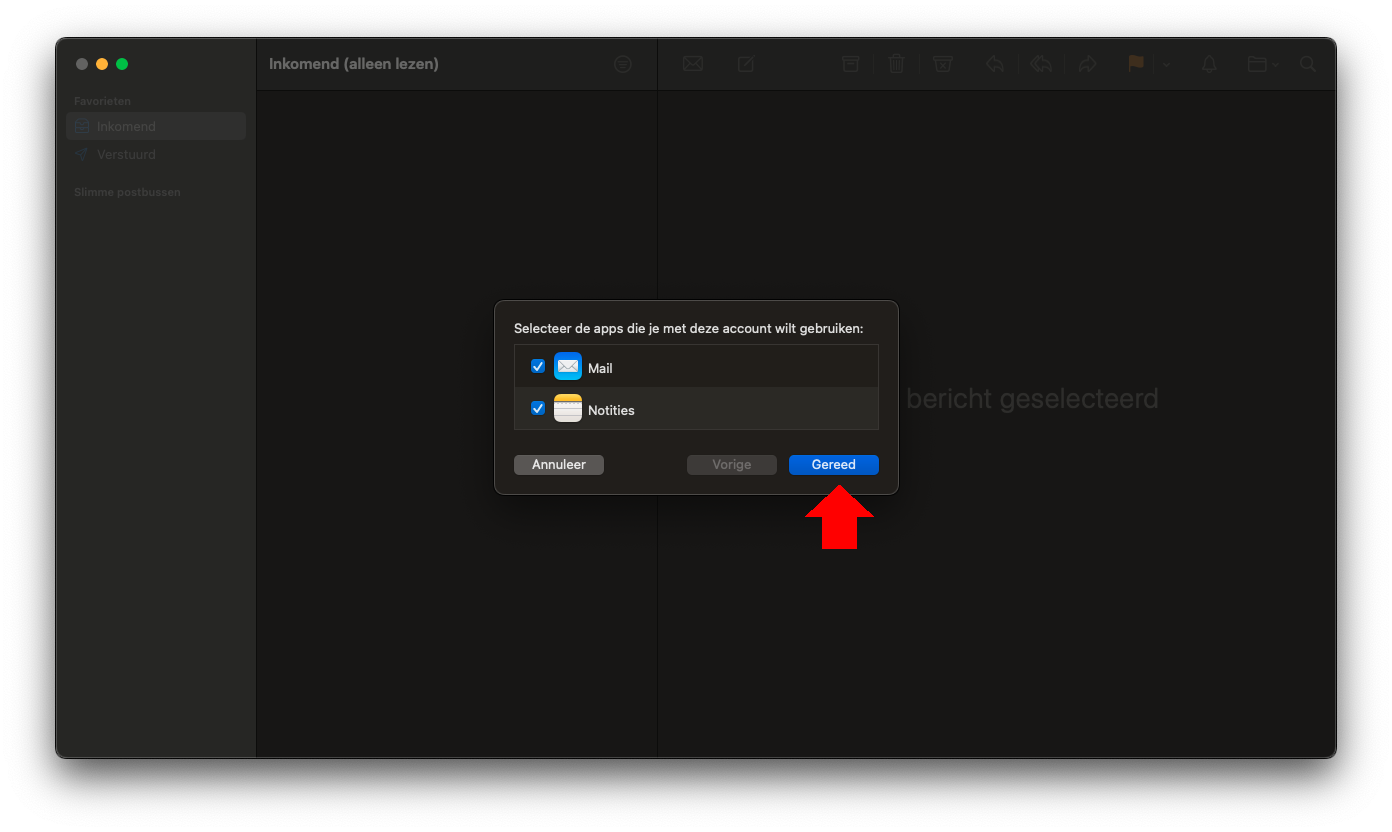
Step 4: Link Apps to Your Account
Apple Mail will ask you to link apps to your account. Mail is required, but Notes and Calendar are optional. If you don't want to link them, you can uncheck them.
Then click Done.
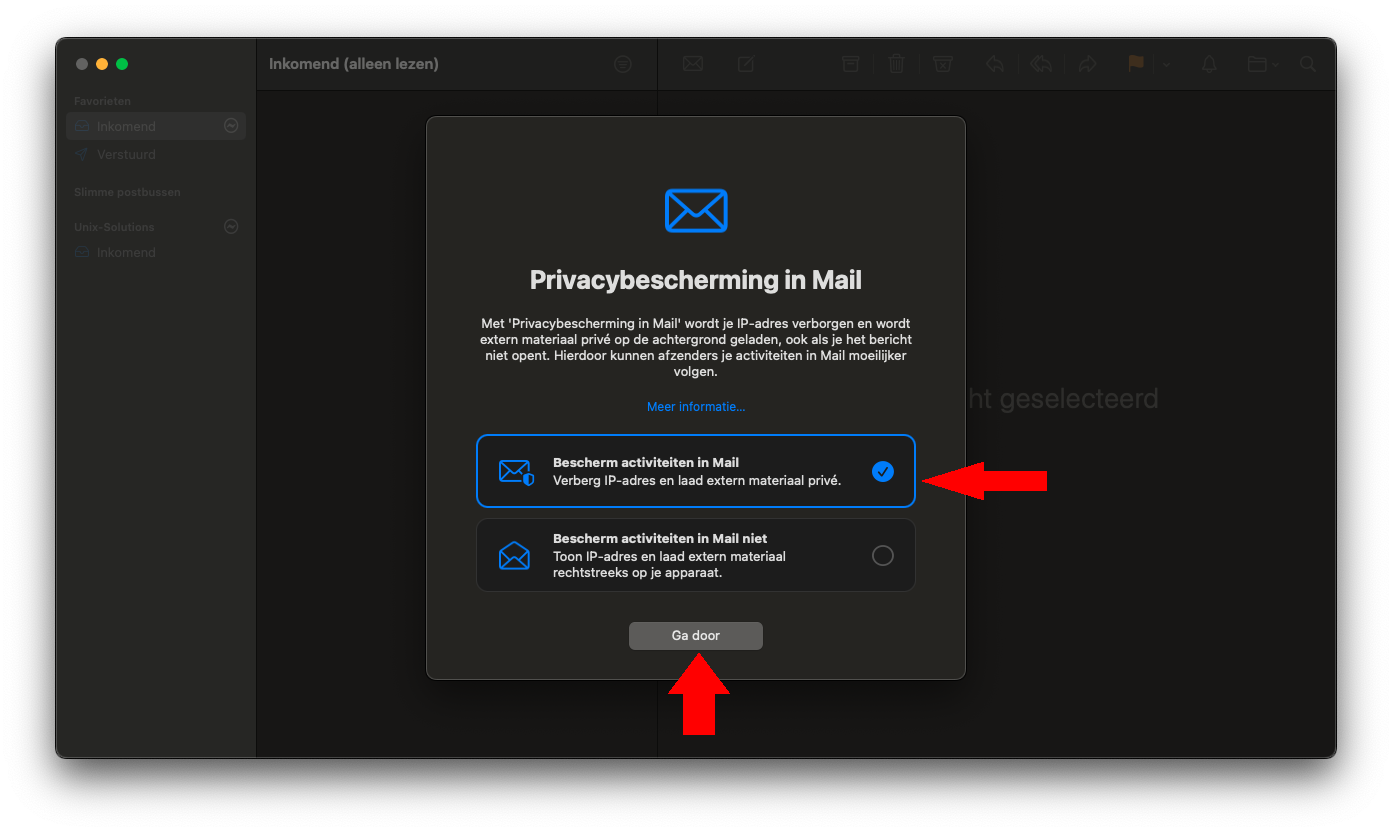
Step 5: Privacy Protection
Apple Mail will ask if you want to enable Privacy Protection. This feature helps protect your privacy but may also affect how you send and receive emails. You can choose to enable or disable it based on your preferences.
You can always toggle this setting later. In this example, we chose to enable it.
Then click Continue.
Step 6: Welcome to Apple Mail
If everything was successful, you will now see the Apple Mail home screen. Here, you can check and manage your emails. You can also explore other app features, such as Calendar and Notes.