Thunderbird
Step 1: Enter Your Account Details
Open the Thunderbird application.
Enter your email address here to ensure the correct settings are applied
Now enter your:
| Field Name | Required Information |
|---|---|
| Your Full Name | Your name |
| Email Address | email@example.com |
| Password | Your password |

Then click Manual Configuration.
Step 2: Enter Server Details
Enter the required server details as shown (make sure to enter your own information):
Incoming Server
| Field Name | Required Information |
|---|---|
| Protocol | IMAP |
| Hostname | mail.example.com |
| Port | 993 |
| Connection Security | SSL/TLS |
| Authentication Method | Normal Password |
| Username | email@example.com |
Outgoing Server
| Field Name | Required Information |
|---|---|
| Hostname | mail.example.com |
| Port | 465 |
| Connection Security | SSL/TLS |
| Authentication Method | Normal Password |
| Username | email@example.com |
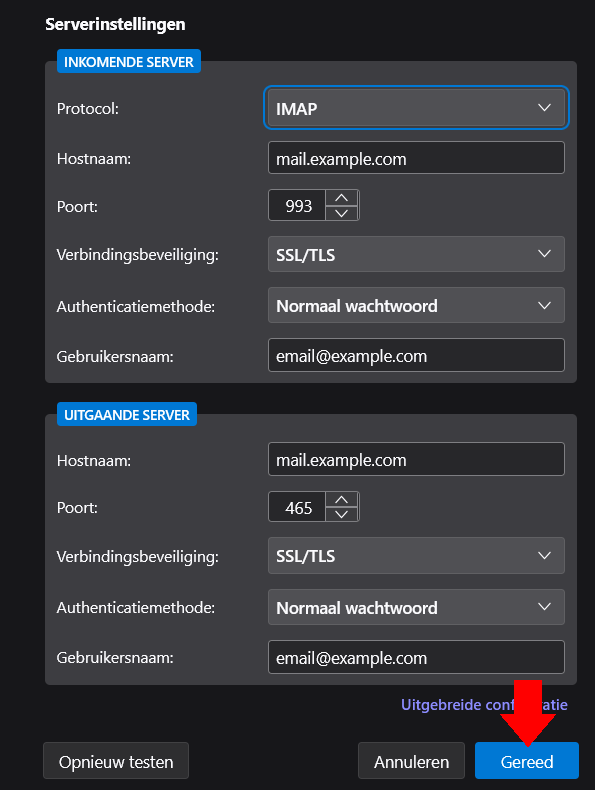
After correctly entering these details, click Done. You will now be directed to your inbox.
warning
If mail.example.com does not work, try example.com
Step 3: Welcome to Thunderbird
If all steps have been followed correctly, the following welcome message will appear.

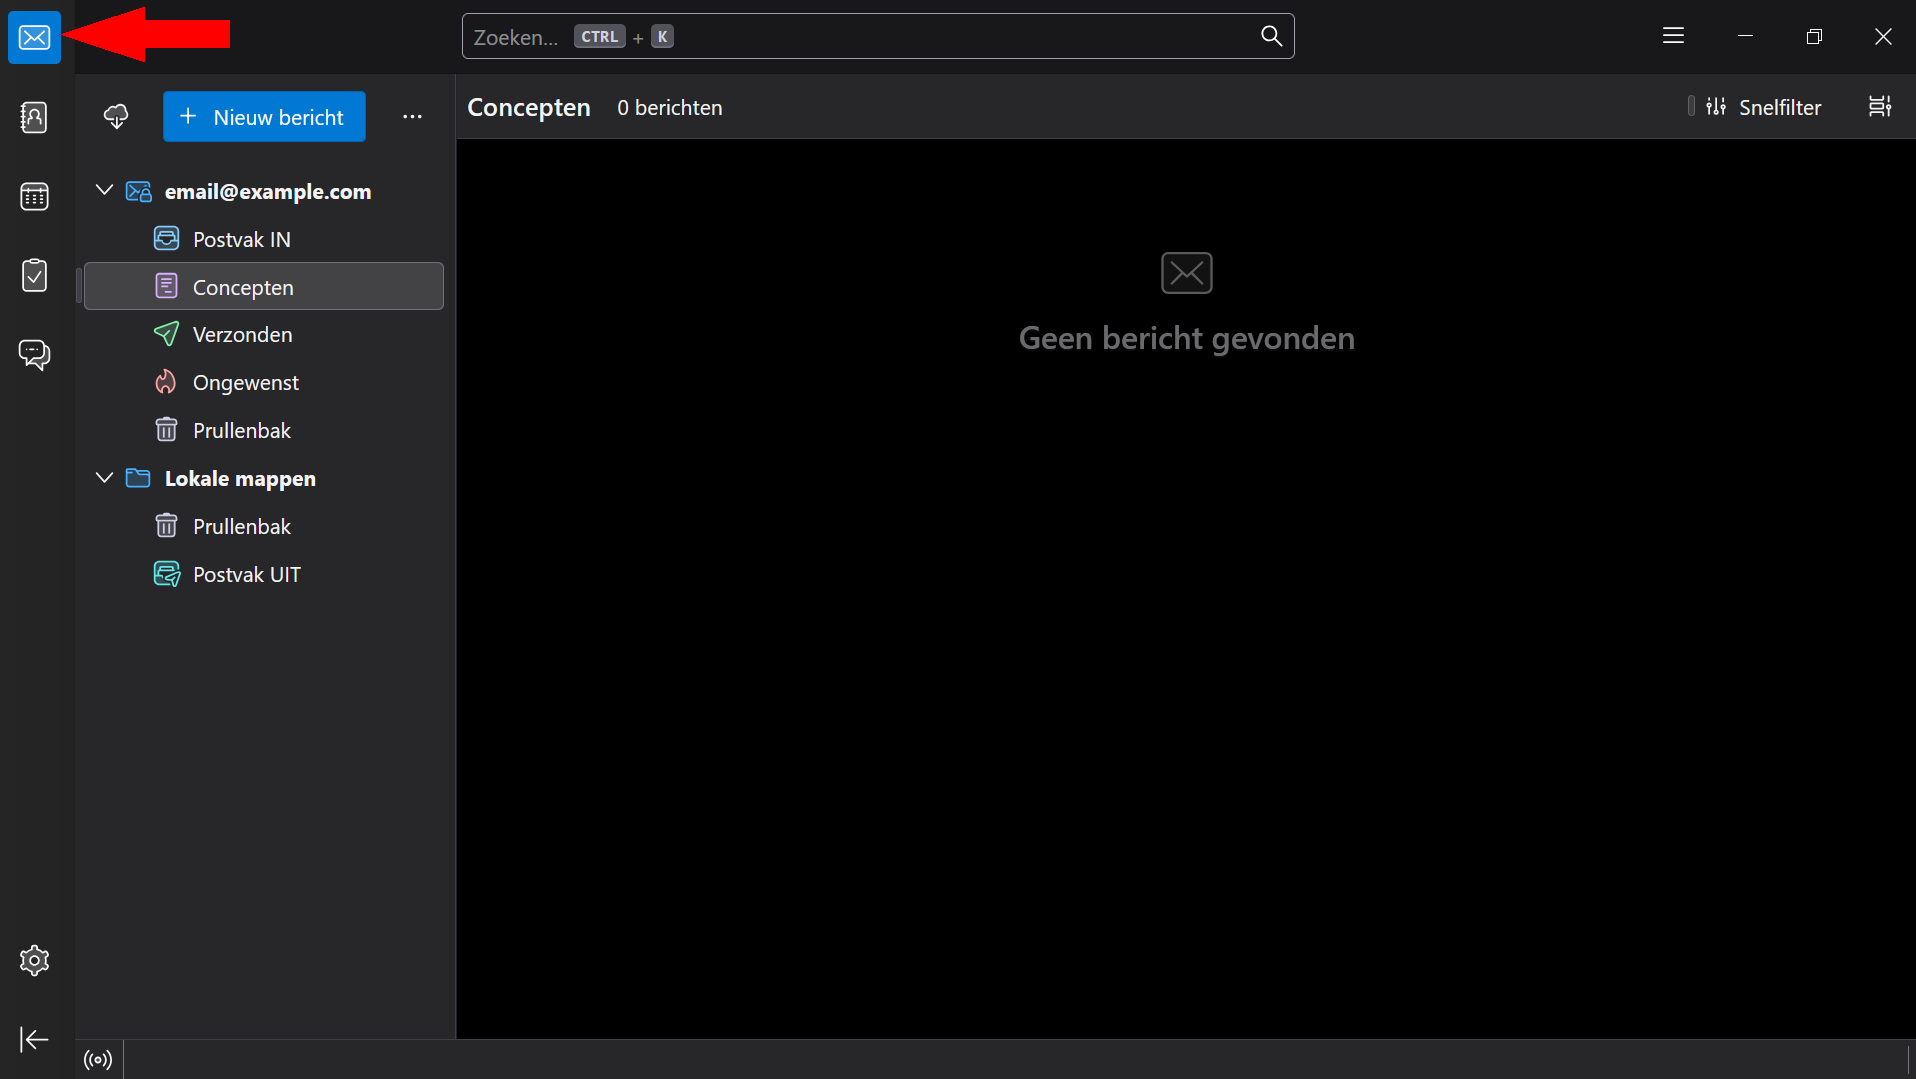
Step 4: Opening Your Inbox
You can now open your inbox (click the envelope icon in the top left) to send and manage your emails.
Additionally, Thunderbird offers extra features such as a calendar, etc.